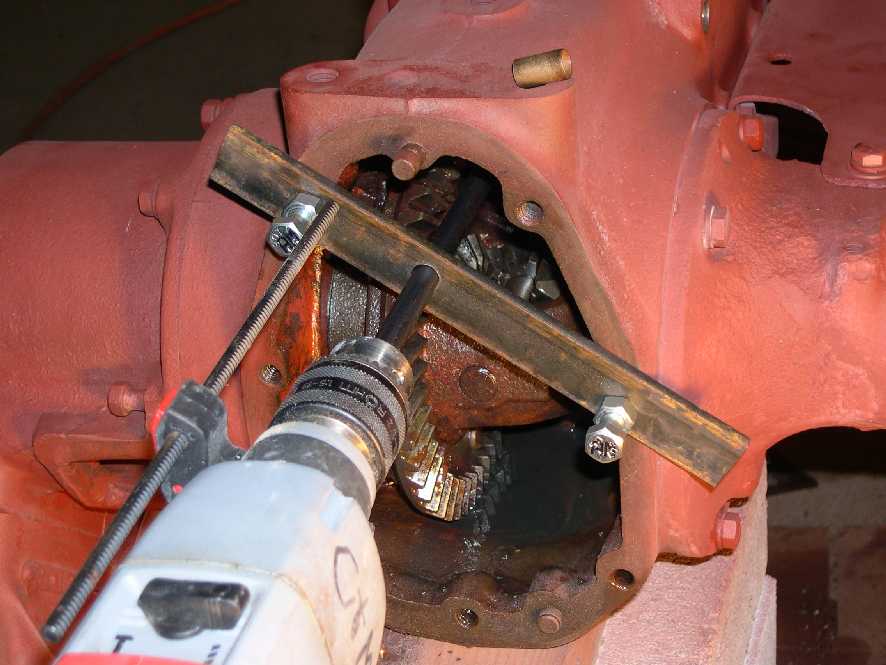
PTO Bushing Guide Tool
This tool allows proper centering and support to drill out the PTO
bushing in the end of the upper transmission shaft.
To make the tool guide, I simply used the rear cover as an outline
to draw the bolt locations and identify the center of the PTO output
shaft onto a piece of paper. Then, using the two cover bolts holes
shown and a 1" X 0.250" thick X 9" piece of stock, I transferred the
paper centers to the stock.
Drill 3/8" holes for mounting and 7/16" for the output shaft centering
hole. Note that the three holes do not line up!

I then used a 12 inch long 27/64" drill for the first pass even though
the new bushing was a few thousandths over 7/16" so as not to risk
drilling into the transmission shaft. After determining that the 27/64"
drill was successful, I carefully drilled it out to
7/16" and picked out the remaining piece of old bushing.
A rag in the rear end housing to catch the debris was helpful as well as
the drill stop.
To reinstall the new bushing, (350-859-R1), I simply slipped it onto
the PTO shaft and used the shaft as a tool to tap the bushing into
place. Do this only after verifying that there was no chamfer on the
shaft that would distort the bushing in any way.
Some of the information contained was obtained from the
Farmall Cub Forum discussion board, whose help and insight has been a valuable
resource.


